Getting Started With MCP Development in C#
This post is a brief quickstart for building MCP (Model Context Protocol) servers in C# using Visual Studio 2026 (with the MCP project template), with local testing in Open WebUI (a free and open-source AI chat client that you can easily run locally). I’ll show you how to make a simple MCP server with one simple tool, running it, and configuring Open WebUI to make use of it.
What we’ll do
- Build a C# MCP server with a simple tool
- Run the MCP server locally (with HTTP transport)
- Register it in Open WebUI and invoke the tools from chat
Prerequisites
- You should have a basic level of experience with C#, and a general understanding of what MCP is
- Visual Studio 2026 (you can download the Community Edition for free here) - make sure to include both the ASP.NET web development and Azure and AI development workloads during setup
- An Open WebUI installation with an LLM backend (or another chat client that supports MCP)
A guide to downloading and setting up Open WebUI exists here - you can choose between using Python or Docker, personally I find it simplest to just run it with Python on my Windows machine. After installation you must connect it to an LLM. This could be a locally running model like Ollama, or an online API which you have a key for (personally I’m using Azure OpenAI). When done, and with the WebUI client running, you should verify that everything works by opening it (by default this should be on https://localhost:8080) and giving it a quick chat.
1) Creating the MCP server project (Visual Studio 2026)
- Open the Create a new project dialog in Visual Studio.
- Search for “MCP” and pick the Local MCP Server Console App C# template.
- Name it something like
HelloMcpServer. - Create the project.
At this point you should have a runnable console-style project. The template generated project includes:
- A
Program.cswith code that sets up and starts the MCP server. - A folder Tools with a class called RandomNumberTools.
You can start it right away to make sure the build works by pressing F5.
2) Looking at the code
The sample Tool class
Let’s take a look at the RandomNumberTools class that was generated by the template:
using System.ComponentModel;
using ModelContextProtocol.Server;

/// <summary>
/// Sample MCP tools for demonstration purposes.
/// These tools can be invoked by MCP clients to perform various operations.
/// </summary>
internal class RandomNumberTools
{
    [McpServerTool]
    [Description("Generates a random number between the specified minimum and maximum values.")]
    public int GetRandomNumber(
        [Description("Minimum value (inclusive)")] int min = 0,
        [Description("Maximum value (exclusive)")] int max = 100)
    {
        return Random.Shared.Next(min, max);
    }
}
With the ModelContextProtocol SDK library being used here, MCP tools and resources can be created in different ways, but the easiest is the attribute-based way done here. Simply declare a normal C# class, and then use the [McpServerTool] attribute on any method you’d like to expose as a tool. The [Description] metadata is sent to the LLM to describe how the tool works/when it should be used, etc.
The Program.cs startup code
The code in Program.cs should look something like this:
using Microsoft.Extensions.DependencyInjection;
using Microsoft.Extensions.Hosting;
using Microsoft.Extensions.Logging;

var builder = Host.CreateApplicationBuilder(args);

// Configure all logs to go to stderr (stdout is used for the MCP protocol messages).
builder.Logging.AddConsole(o => o.LogToStandardErrorThreshold = LogLevel.Trace);

// Add the MCP services: the transport to use (stdio) and the tools to register.
builder.Services
    .AddMcpServer()
    .WithStdioServerTransport()
    .WithTools<RandomNumberTools>();

await builder.Build().RunAsync();
I’ll explain briefly what happens here (without assuming too much prior experience with C# server app development):
var builder = Host.CreateApplicationBuilder(args);
This sets up an application builder, which is an object that is used to configure, build and run a hosted server application.
// Configure all logs to go to stderr (stdout is used for the MCP protocol messages).
builder.Logging.AddConsole(o => o.LogToStandardErrorThreshold = LogLevel.Trace);
This sets up where the log output from the app server gets routed. The way it’s set up here all the logging goes to STDERR.
// Add the MCP services: the transport to use (stdio) and the tools to register.
builder.Services
    .AddMcpServer()
    .WithStdioServerTransport()
    .WithTools<RandomNumberTools>();
This is where the MCP magic happens. .AddMcpServer() adds the services needed for MCP server functionality to the app. .WithStdioServerTransport() configures it to use STDIO for communication with the LLM client (which is sometimes used when testing locally).
await builder.Build().RunAsync();
This line assembles the server app host object from the configuration we’ve set up in the builder and starts it immediately in a separate Task, which is awaited to complete before the app can close.
3) A quick modification (using HTTP for transport)
Personally, I prefer using HTTP for communication between the MCP server and the LLM chat client when testing locally (it’s also what you would likely prefer in a production setting).
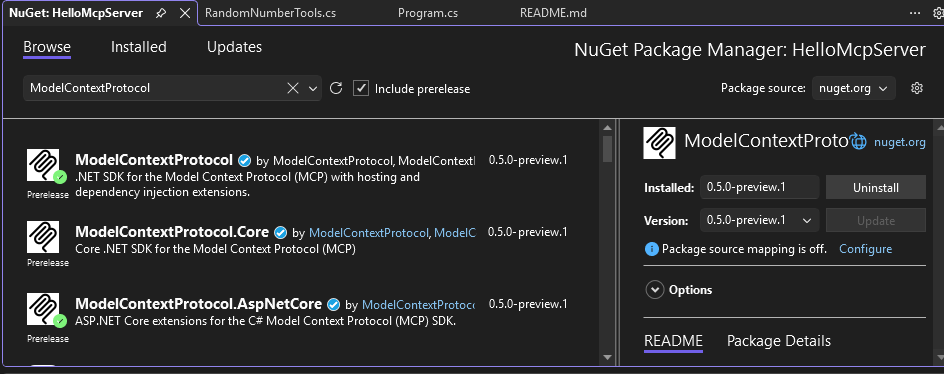
In order to enable the HTTP transport mechanism we first need to add the ModelContextProtocol.AspNetCore NuGet package to the project, because it’s not included automatically by the template. You can do this by opening a terminal in Visual Studio (View->Terminal on the menu) and, standing at the project root, run:
dotnet add package ModelContextProtocol.AspNetCore.
Alternatively, you could browse for and install the package using the NuGet Package Manager in Visual Studio (right-click the project and click Manage NuGet Packages…).
NOTE: At the time of writing, all the ModelContextProtocol packages are still in prerelease. If that’s still the case you may have to add the prerelease option to the terminal command, like this:
dotnet add package ModelContextProtocol.AspNetCore --prerelease
If using the Package Manager UI then you’d have to make sure Include prerelease is clicked:
Now that the package is added, here is a revised version of Program.cs with my changes:
using Microsoft.AspNetCore.Builder;
using Microsoft.Extensions.DependencyInjection;
using Microsoft.Extensions.Logging;

var builder = WebApplication.CreateBuilder(args);
builder.Logging.AddConsole().AddDebug();
builder.Services
    .AddMcpServer()
    .WithHttpTransport()
    .WithTools<RandomNumberTools>();

var app = builder.Build();
app.MapMcp();
app.Run("http://localhost:3002");
As you’ll notice, I’ve made a few changes from the generated code. I’m now using a web application builder (used for ASP.NET Core web apps, which our MCP server now is) and I’ve replaced .WithStdioServerTransport() with .WithHttpTransport(). I’ve also changed the logging so that it’s routed to the stdout (standard console output no longer reserved for MCP server communcation) and also to the debug output so that it’s shows up in the Output->Debug panel in Visual Studio when debugging.
You’ll notice I’ve also set the local URL I’d like it to serve from on the last line, localhost:3002 (could be changed to any port you prefer).
You can now debug the app by pressing F5 in Visual Studio, or start it from a terminal in the project root:
dotnet run --project .\HelloMcpServer.csproj
If all goes well, the MCP server should now start with a console window showing a log message like:

5) Register your MCP server in Open WebUI
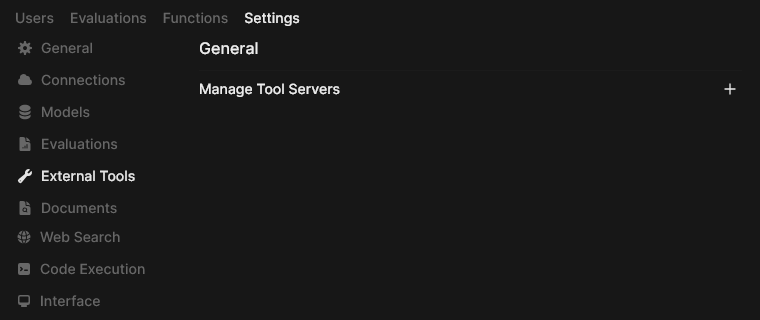
Now, let’s register the MCP server in Open WebUI and test it. From the main page, click your profile icon, then Admin Panel. From here, navigate to the Settings tab and then External Tools:
Click the ‘+’ icon to the right to add your server. Use the following configuration:
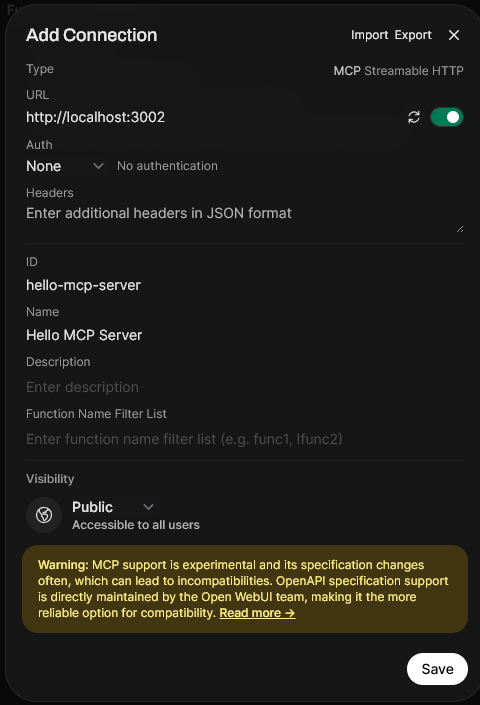
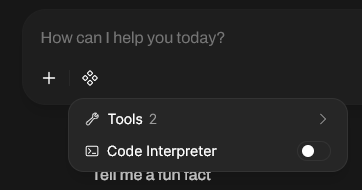
Now click Save. If you start a New Chat, it should show up in the list of Tools just below the chat panel, where it needs to be enabled:
Now we can test that the server works by prompting something like this:
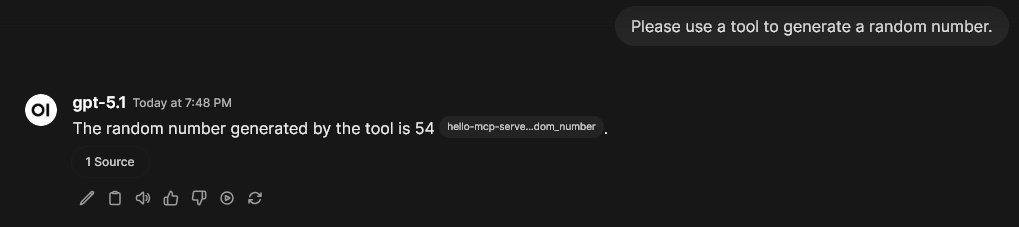
As you can see, the LLM was able to fetch a random number from our MCP server. Congrats, you now have the basic setup needed to code and test an MCP server locally.